Most questions I receive during workshops and lectures aren’t about Figma’s features, but rather about how I actually work. How I combine everything, think through a project, and turn all those features into a working, maintainable file. This week, I want to focus on workflow, the flow behind the features. Because it’s true: even if you master every feature, what really matters is when and how you use them. That’s where flow, clarity, and collaboration happen.
Spoiler: of course, “it depends.” Would not be design otherwise, would it ;) I don’t have the solution, but I’ll share what’s worked for me so you can take what fits and build your own.
My Figma file setup: When I use what
Figma can be a feature overload. Variants, modes, variables, props, So what does a file really need, and when? I’m a big fan of build what you need, not what looks impressive. This is how I decide how deep to go and what to include:
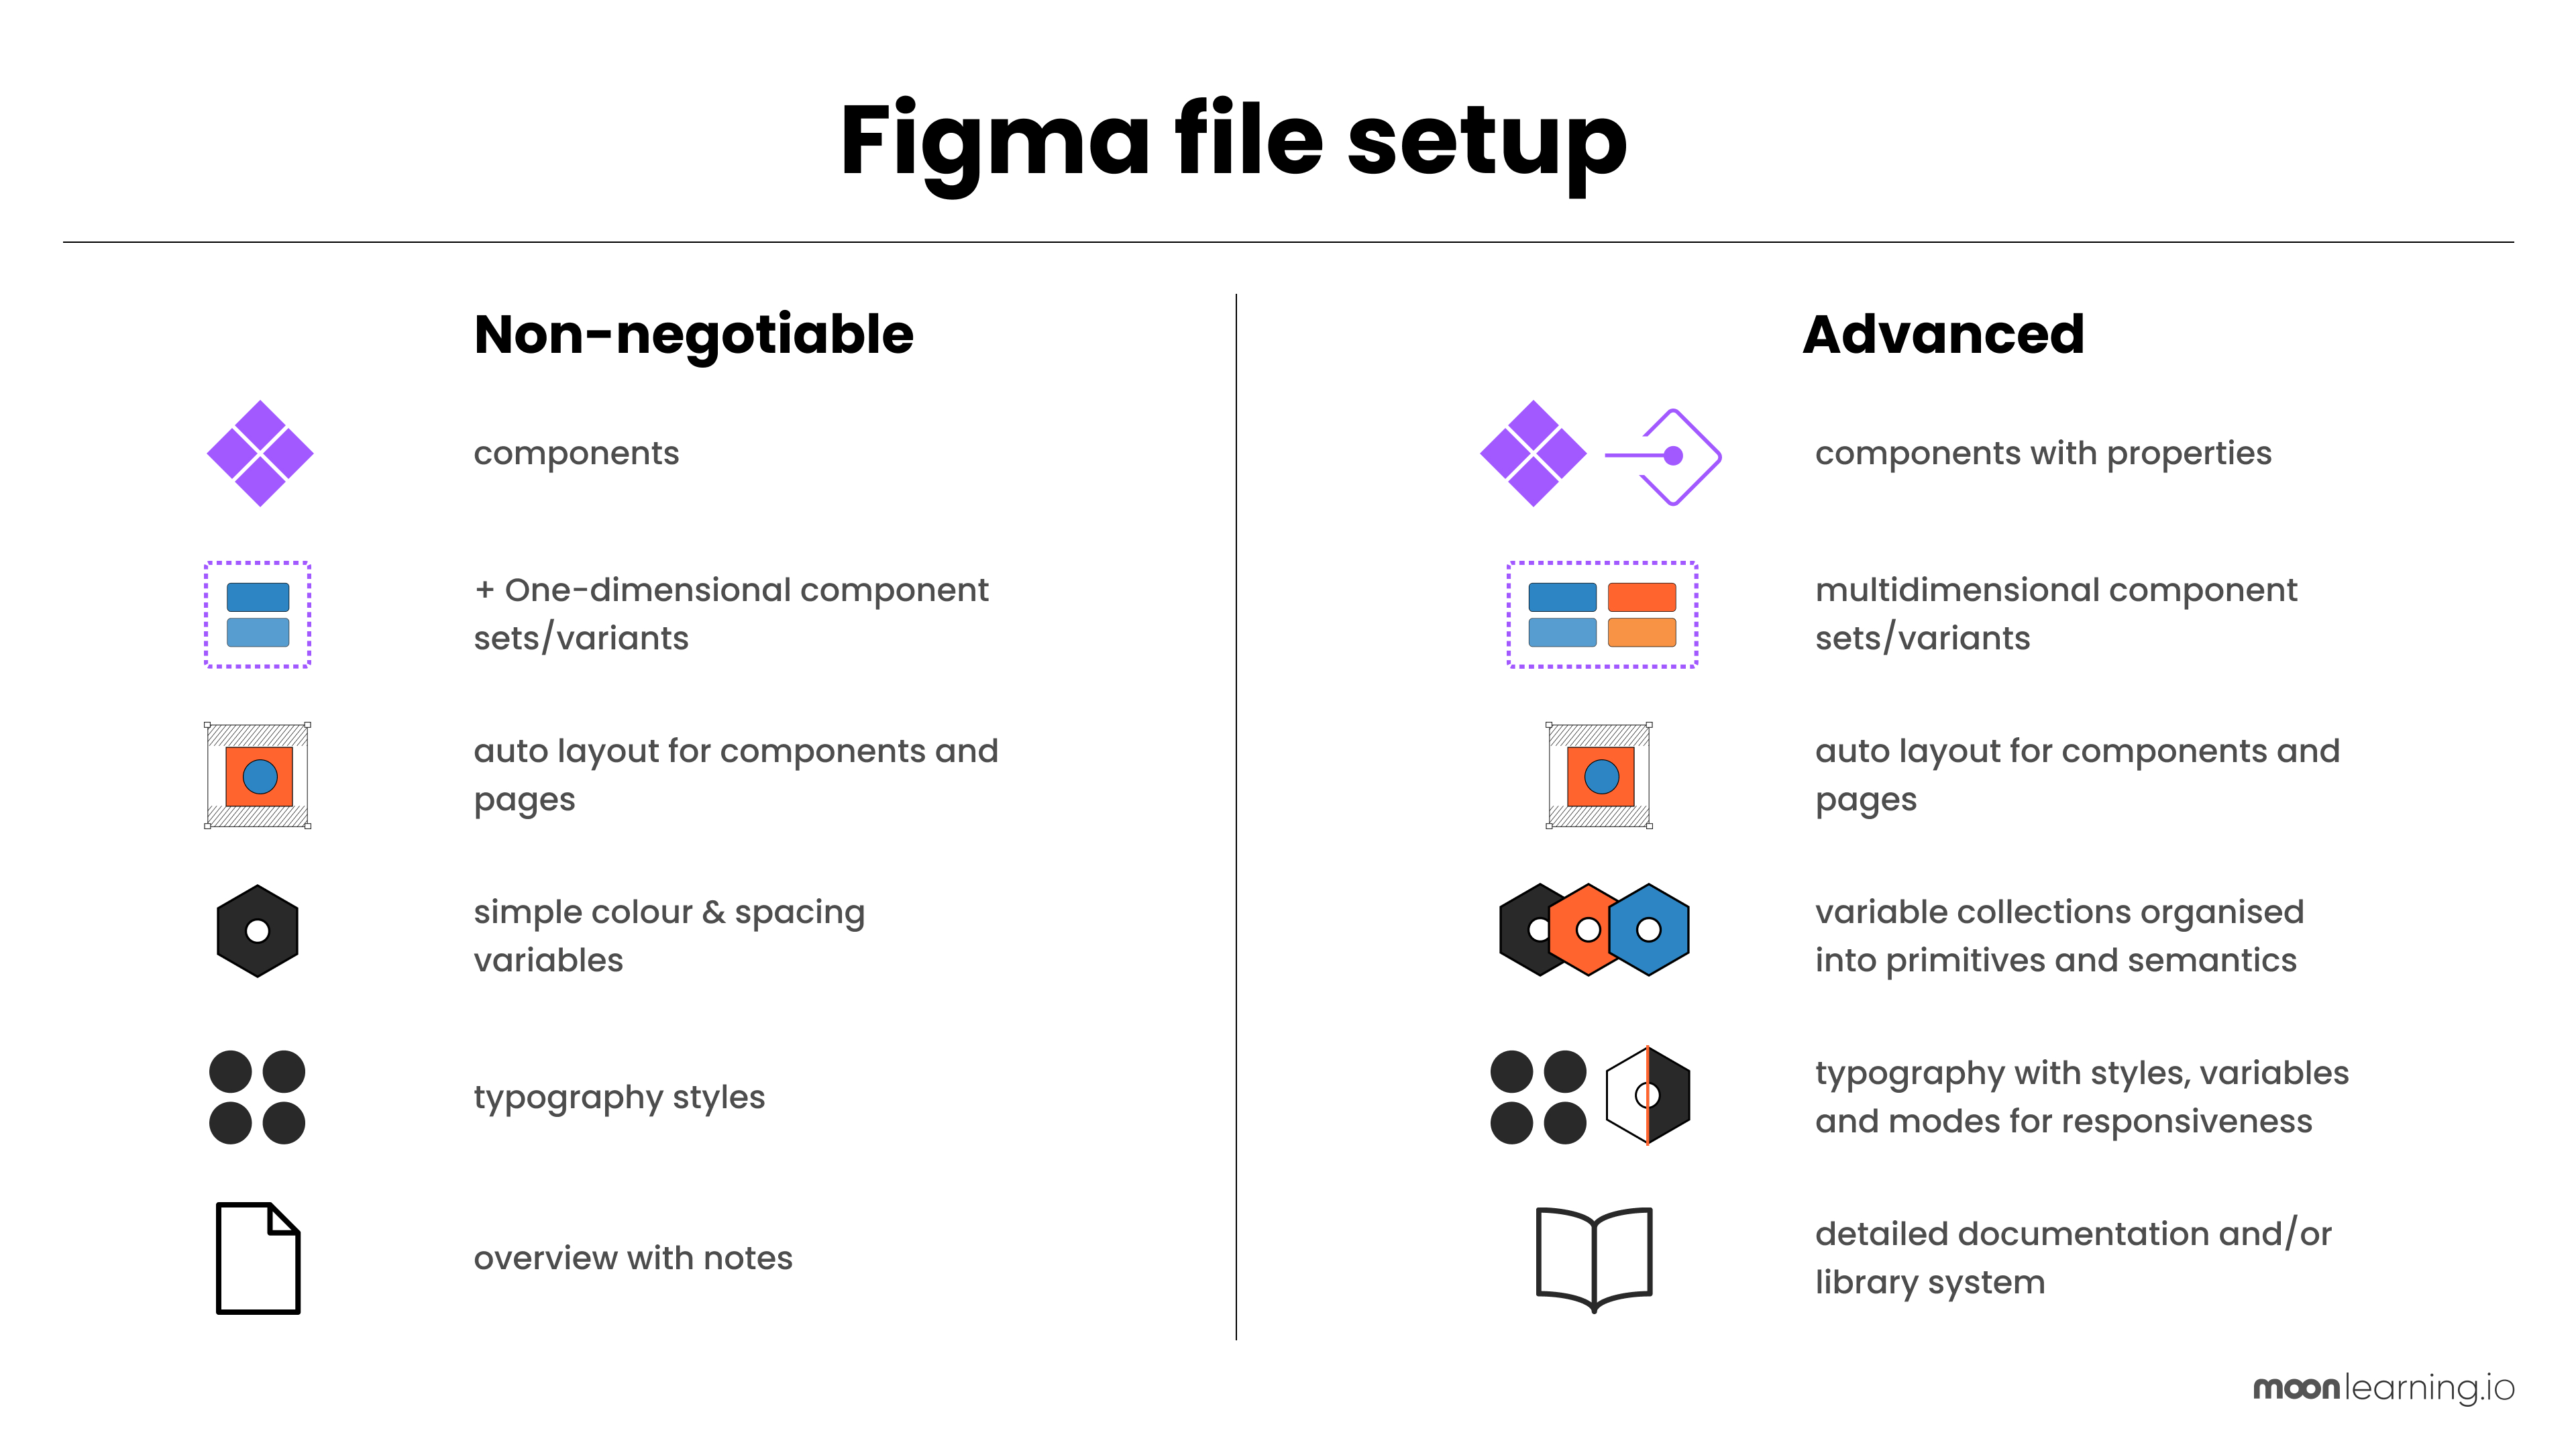
👉 The non-negotiables:
Every file that lives between design and production should have:
- Components: Basic one-dimensional sets with variants, all using Auto Layout (yes, you need to learn Auto Layout!)
- Colour variables, plus the most common spacing variables/system
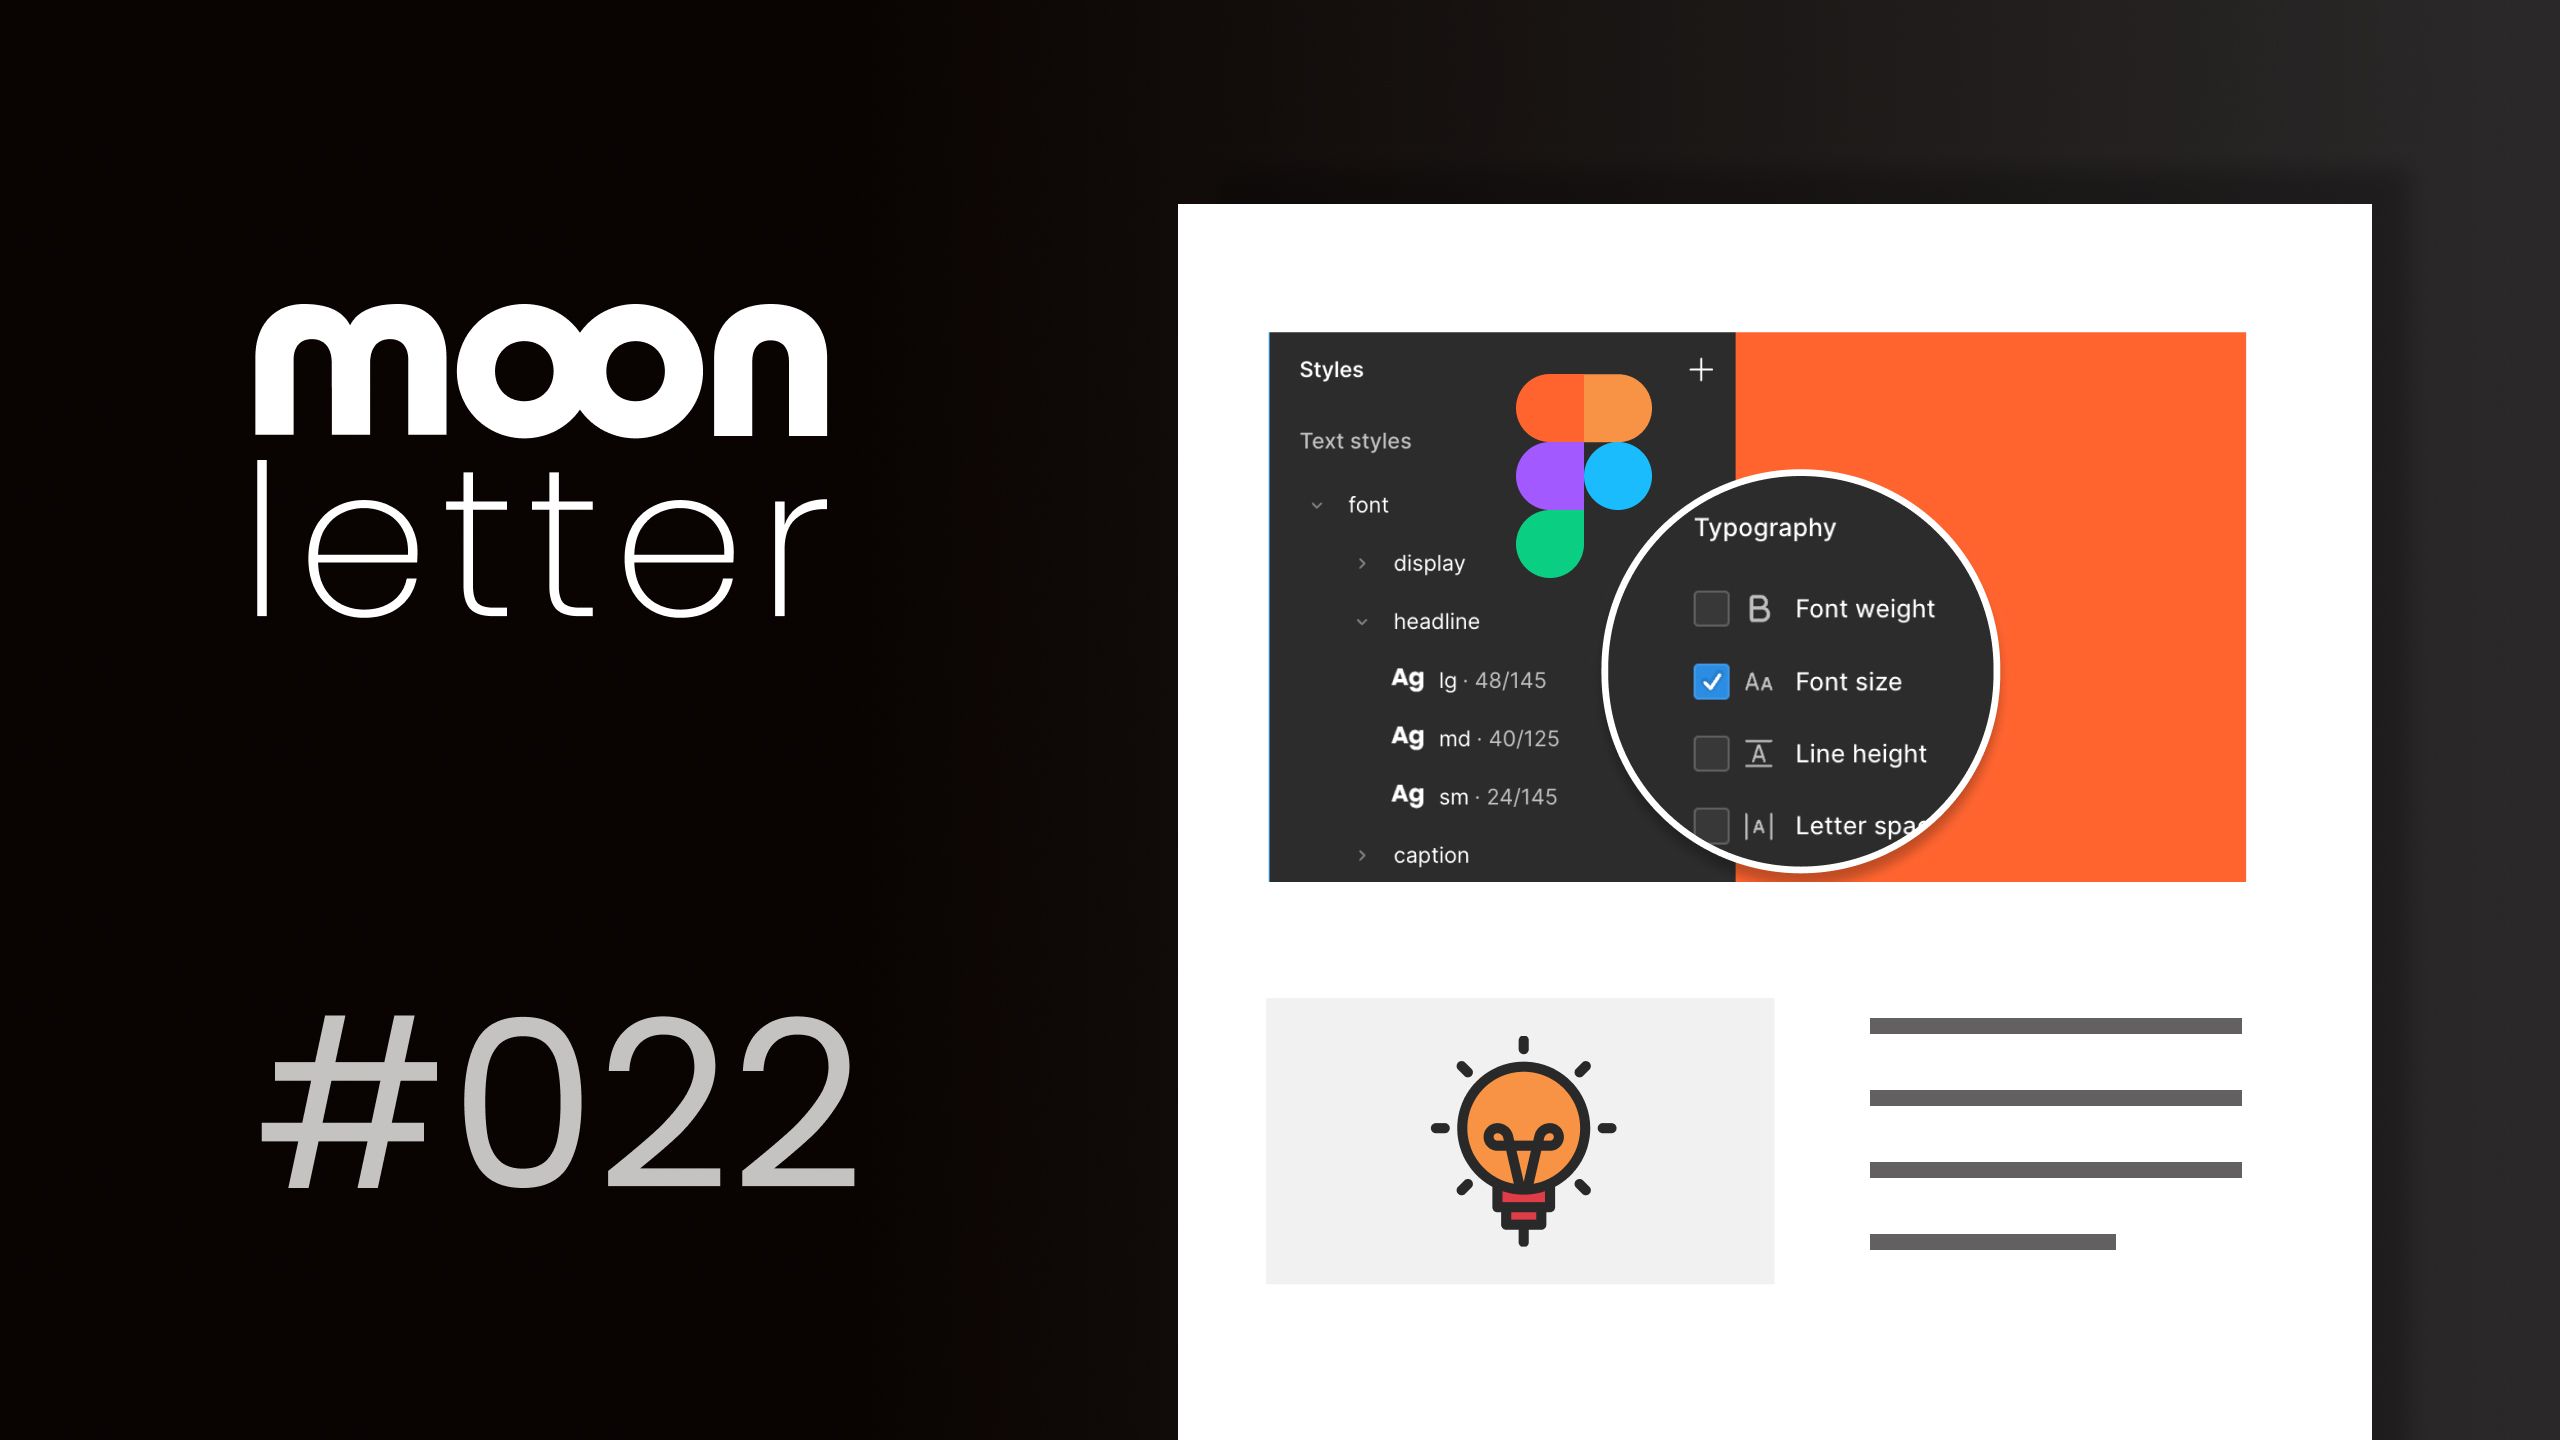
- Typography styles for a clear and consistent hierarchy
- Clear overview and notes where necessary
That’s the base. Make sure you know this setup inside out and have a clear process to onboard anyone so they can replicate it easily. If you’re working with a small budget, frequent freelancer turnover, or shifting priorities: Keep it simple. A clean, minimal file will always outperform a complex one that no one maintains.
👉 The next level:
Your team is growing, confidence is building, and everyone’s ready to give the file some love and care. If you’re at this stage and want to go deeper, I cover this in my courses and workshops at moonlearning.io, just saying ;)
Now you can start adding features for speed and scalability:
- Multi-dimensional variants with component properties
- Variables are organised into primitives and semantics
- Modes for light/dark themes or similar, and spacing across screen sizes
- Responsive typography with styles including variables and modes
- Interactive components
- Detailed documentation and/or library system
The trick isn’t knowing every Figma feature; it’s knowing when to use them.
Keep your system simple, flexible, and ready to grow with your team.
I Build Scales Backwards: The Snapshot Method
There are great tools to help you build type scales (like TypeScale or Utopia), but I use a slightly different approach, I call it the “snapshot method whereby I design → deconstruct → rebuild:
|

Where to store your Figma components?
There are three good options and one place you should never store them, let's explore:
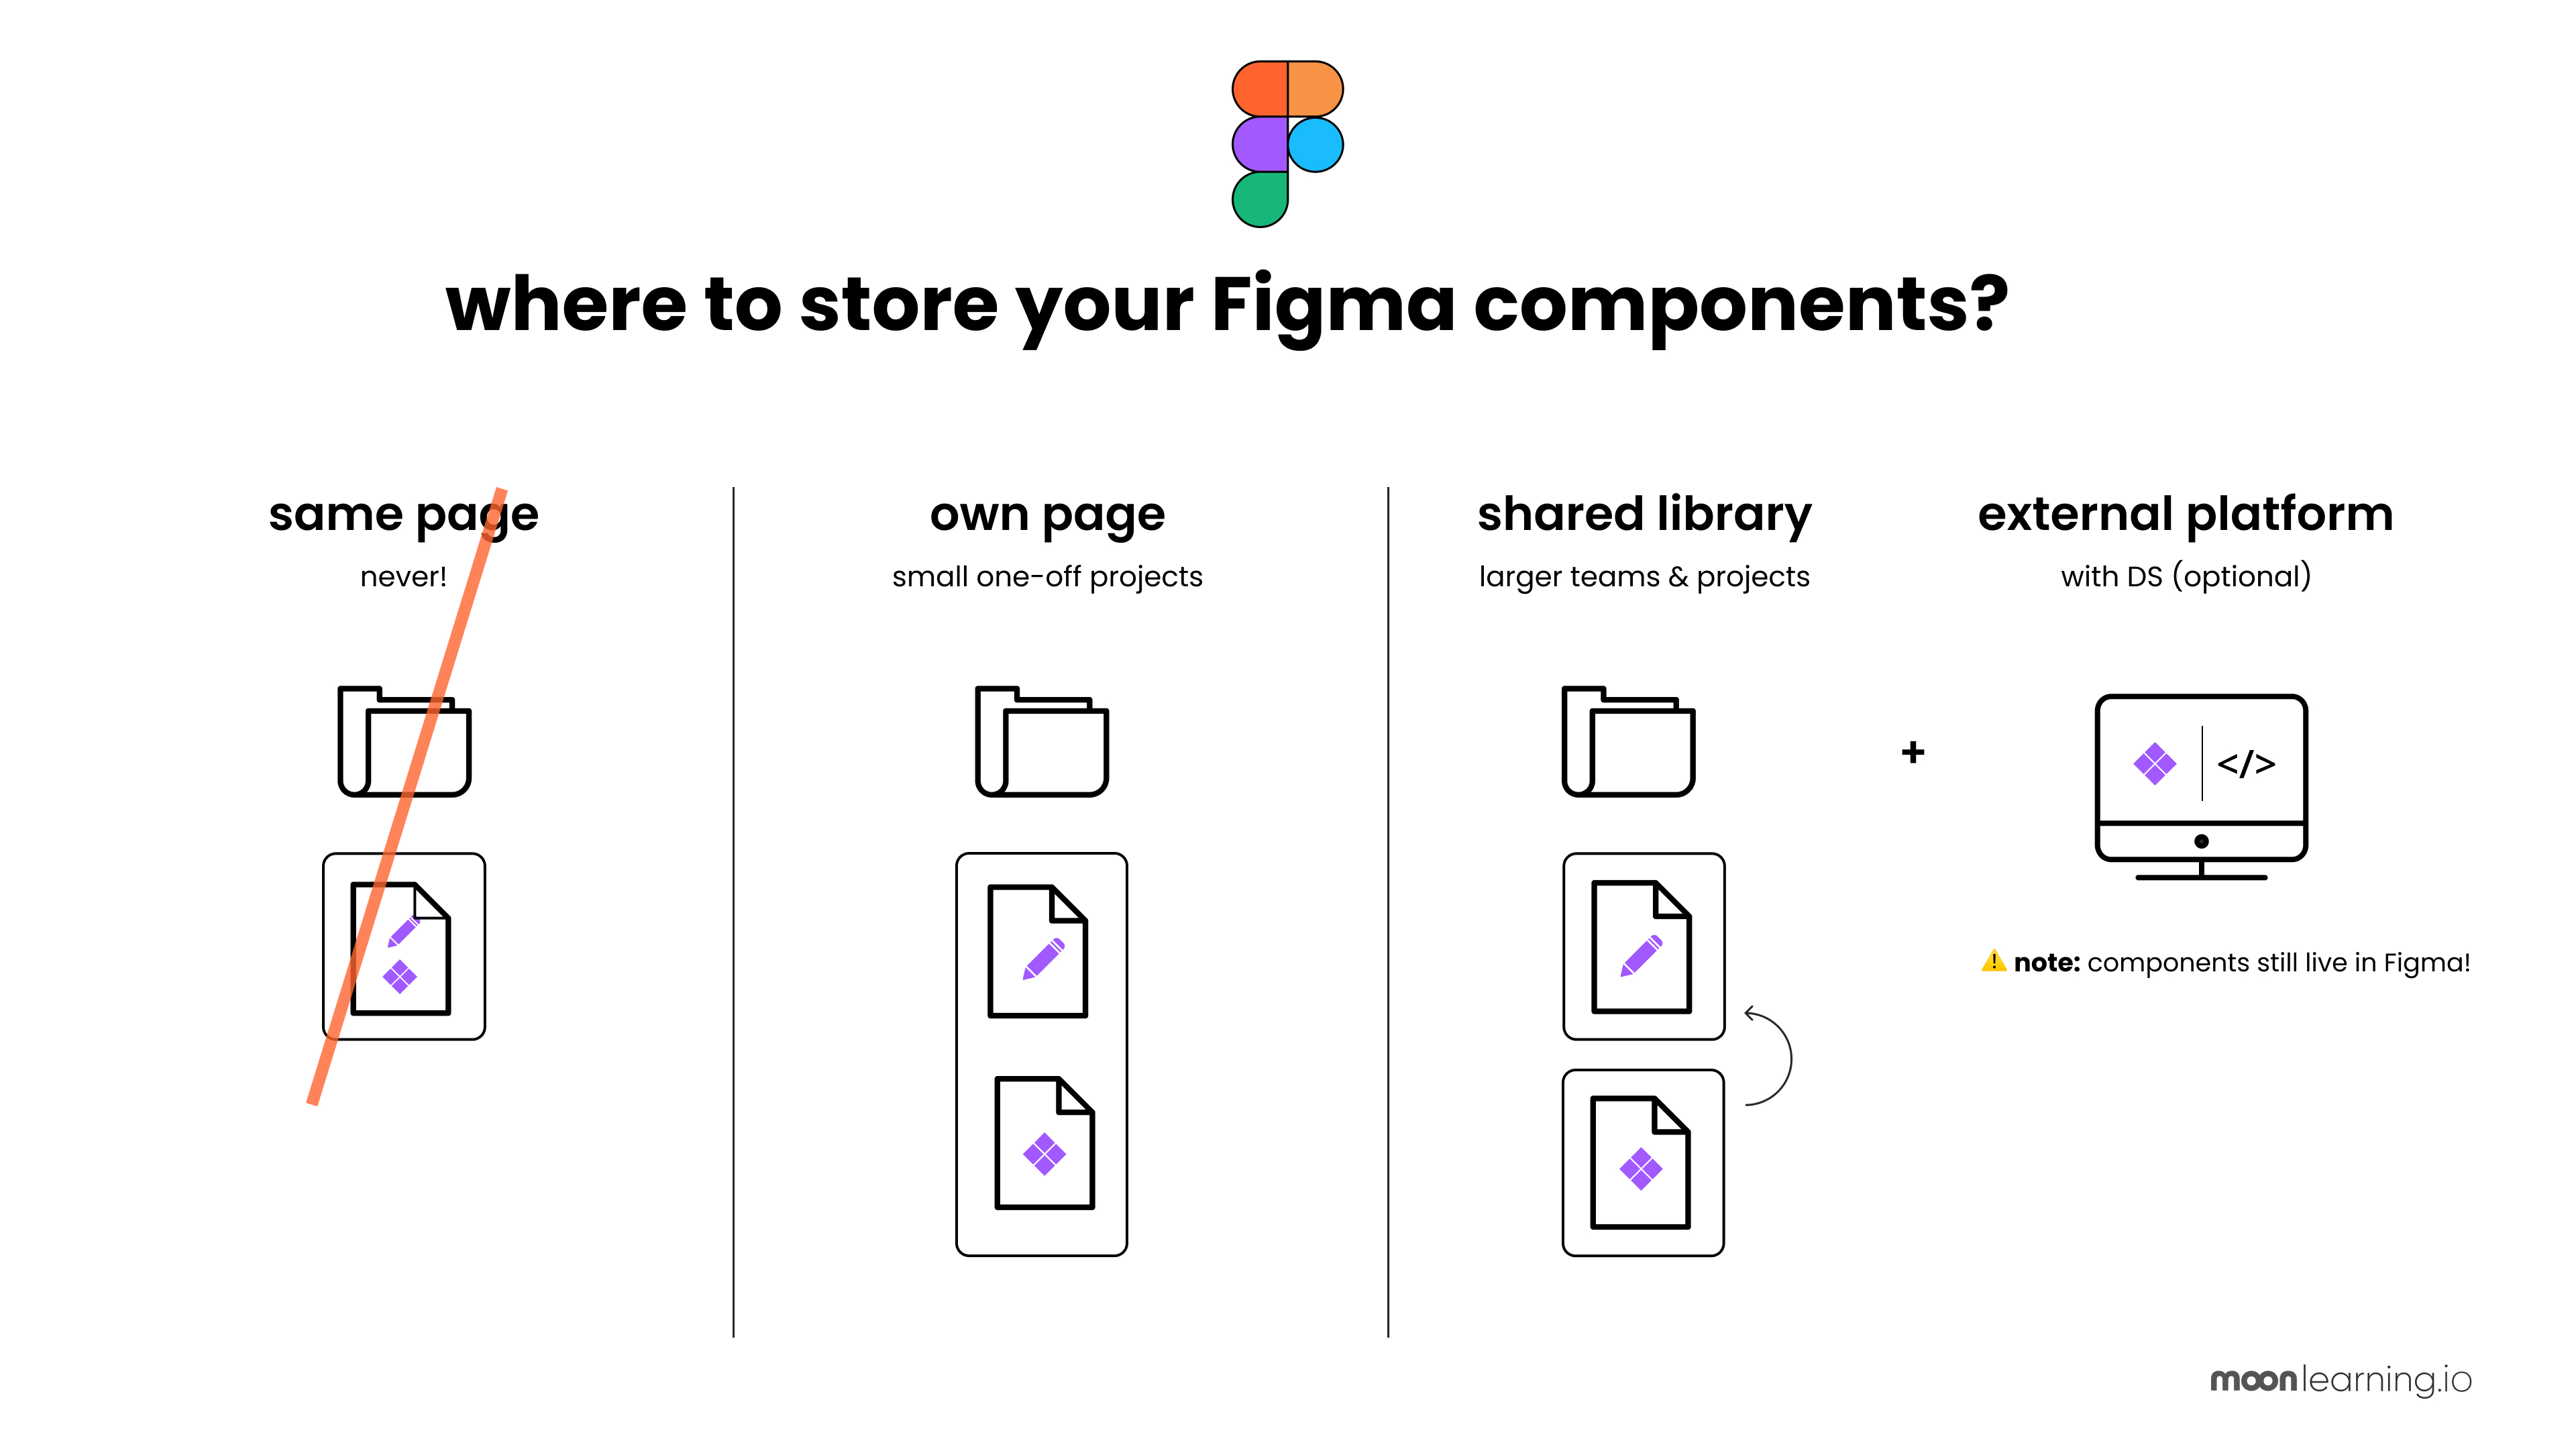
⚠️ 1. Never store components on the same page as your actual design.
Keep your system and your screens well apart. Mixing them quickly leads to confusion, outdated components, and messy handoffs.
✅ 2. For smaller projects:
You can store your components on a separate page within the same file.
This works well for freelancers or one-off projects where you need to share a single, self-contained file with a client or developer.
✅ 3. For larger teams:
Move your components into a dedicated Figma library file.
Publish it as a shared team library and pull it into multiple design files.
That way, updates flow to every project and you keep a single source of truth.
I have a free YouTube tutorial about libraries.
✅ 4. And design external documentation tools?
External documentation tools like Zeroheight or Supernova connect Figma files with design docs and code, helping keep design, documentation, and development in sync.
Pros: great for onboarding, visual alignment, accessibility for non-designers, and scalability.
Cons: require maintenance, add cost and setup, and don’t replace your Figma library.
Best for: teams with established or growing design systems and the resources to maintain alignment.
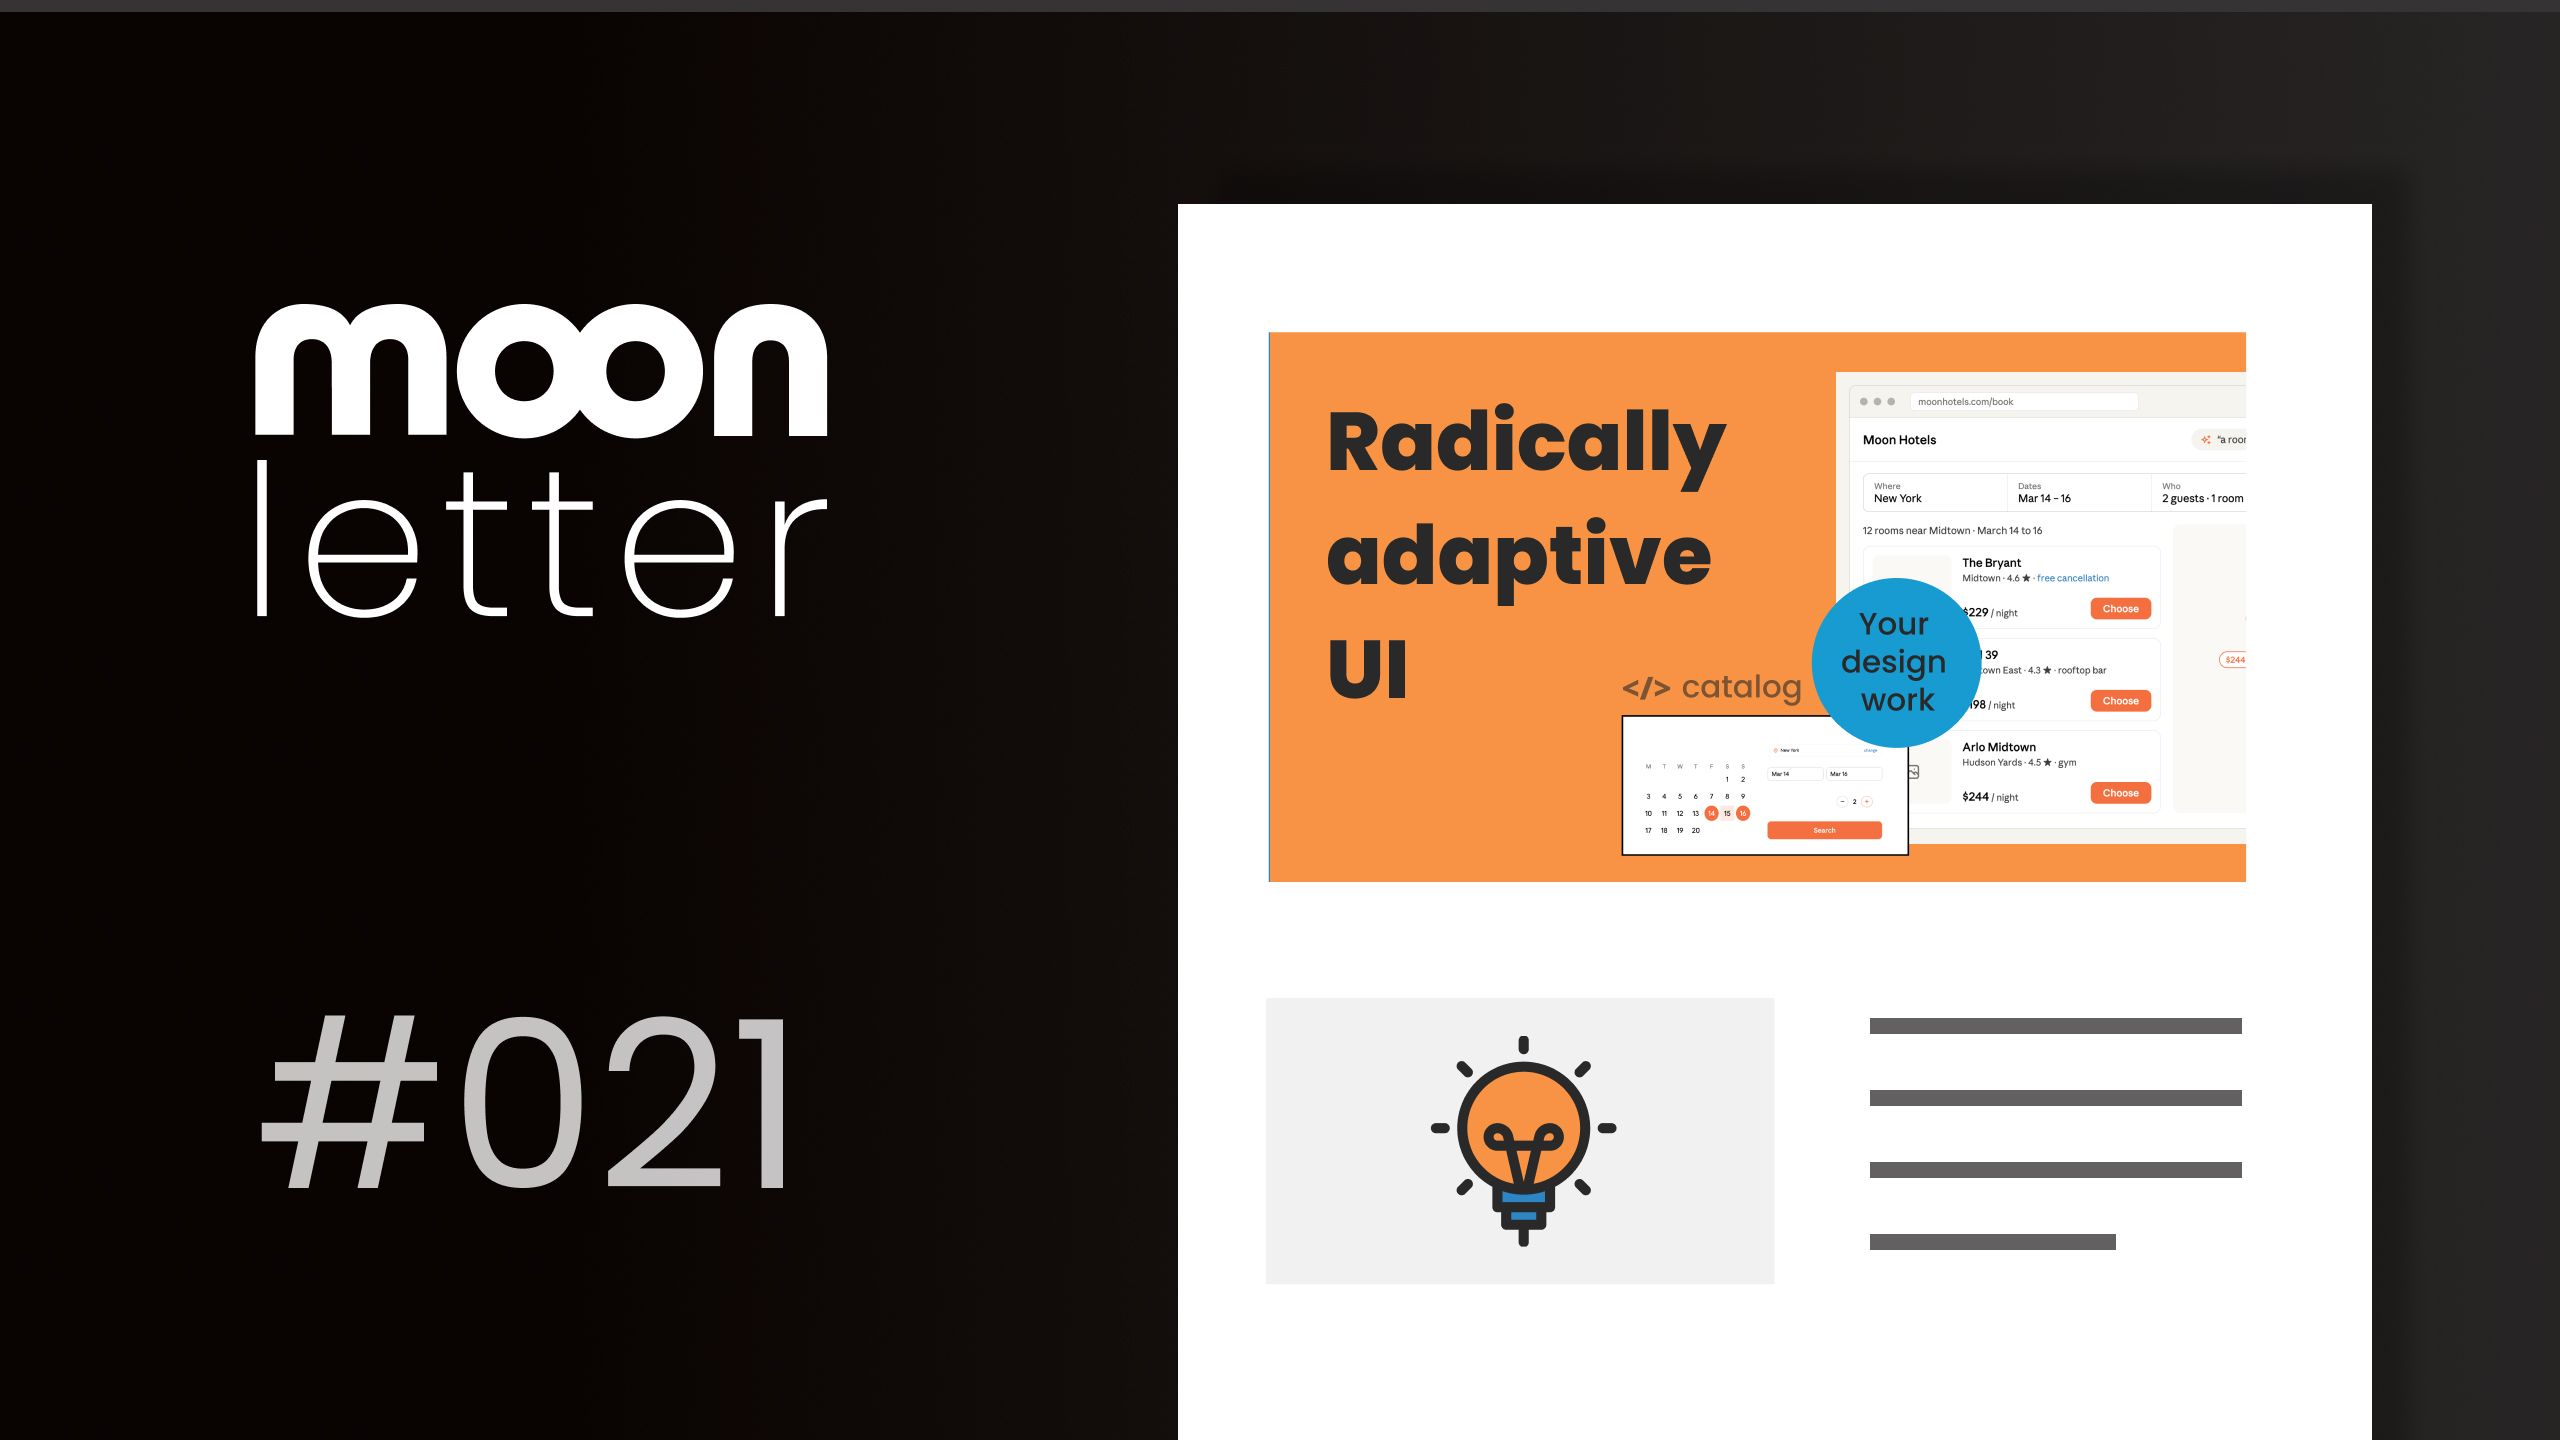
How to structure a Figma project from start to finish
How to structure a Figma project from start to finish. It’s the question I get asked most. For me: Full freedom to start. Strong systems after is the key. Here’s my full process, using a small (!) solo design project as an example.
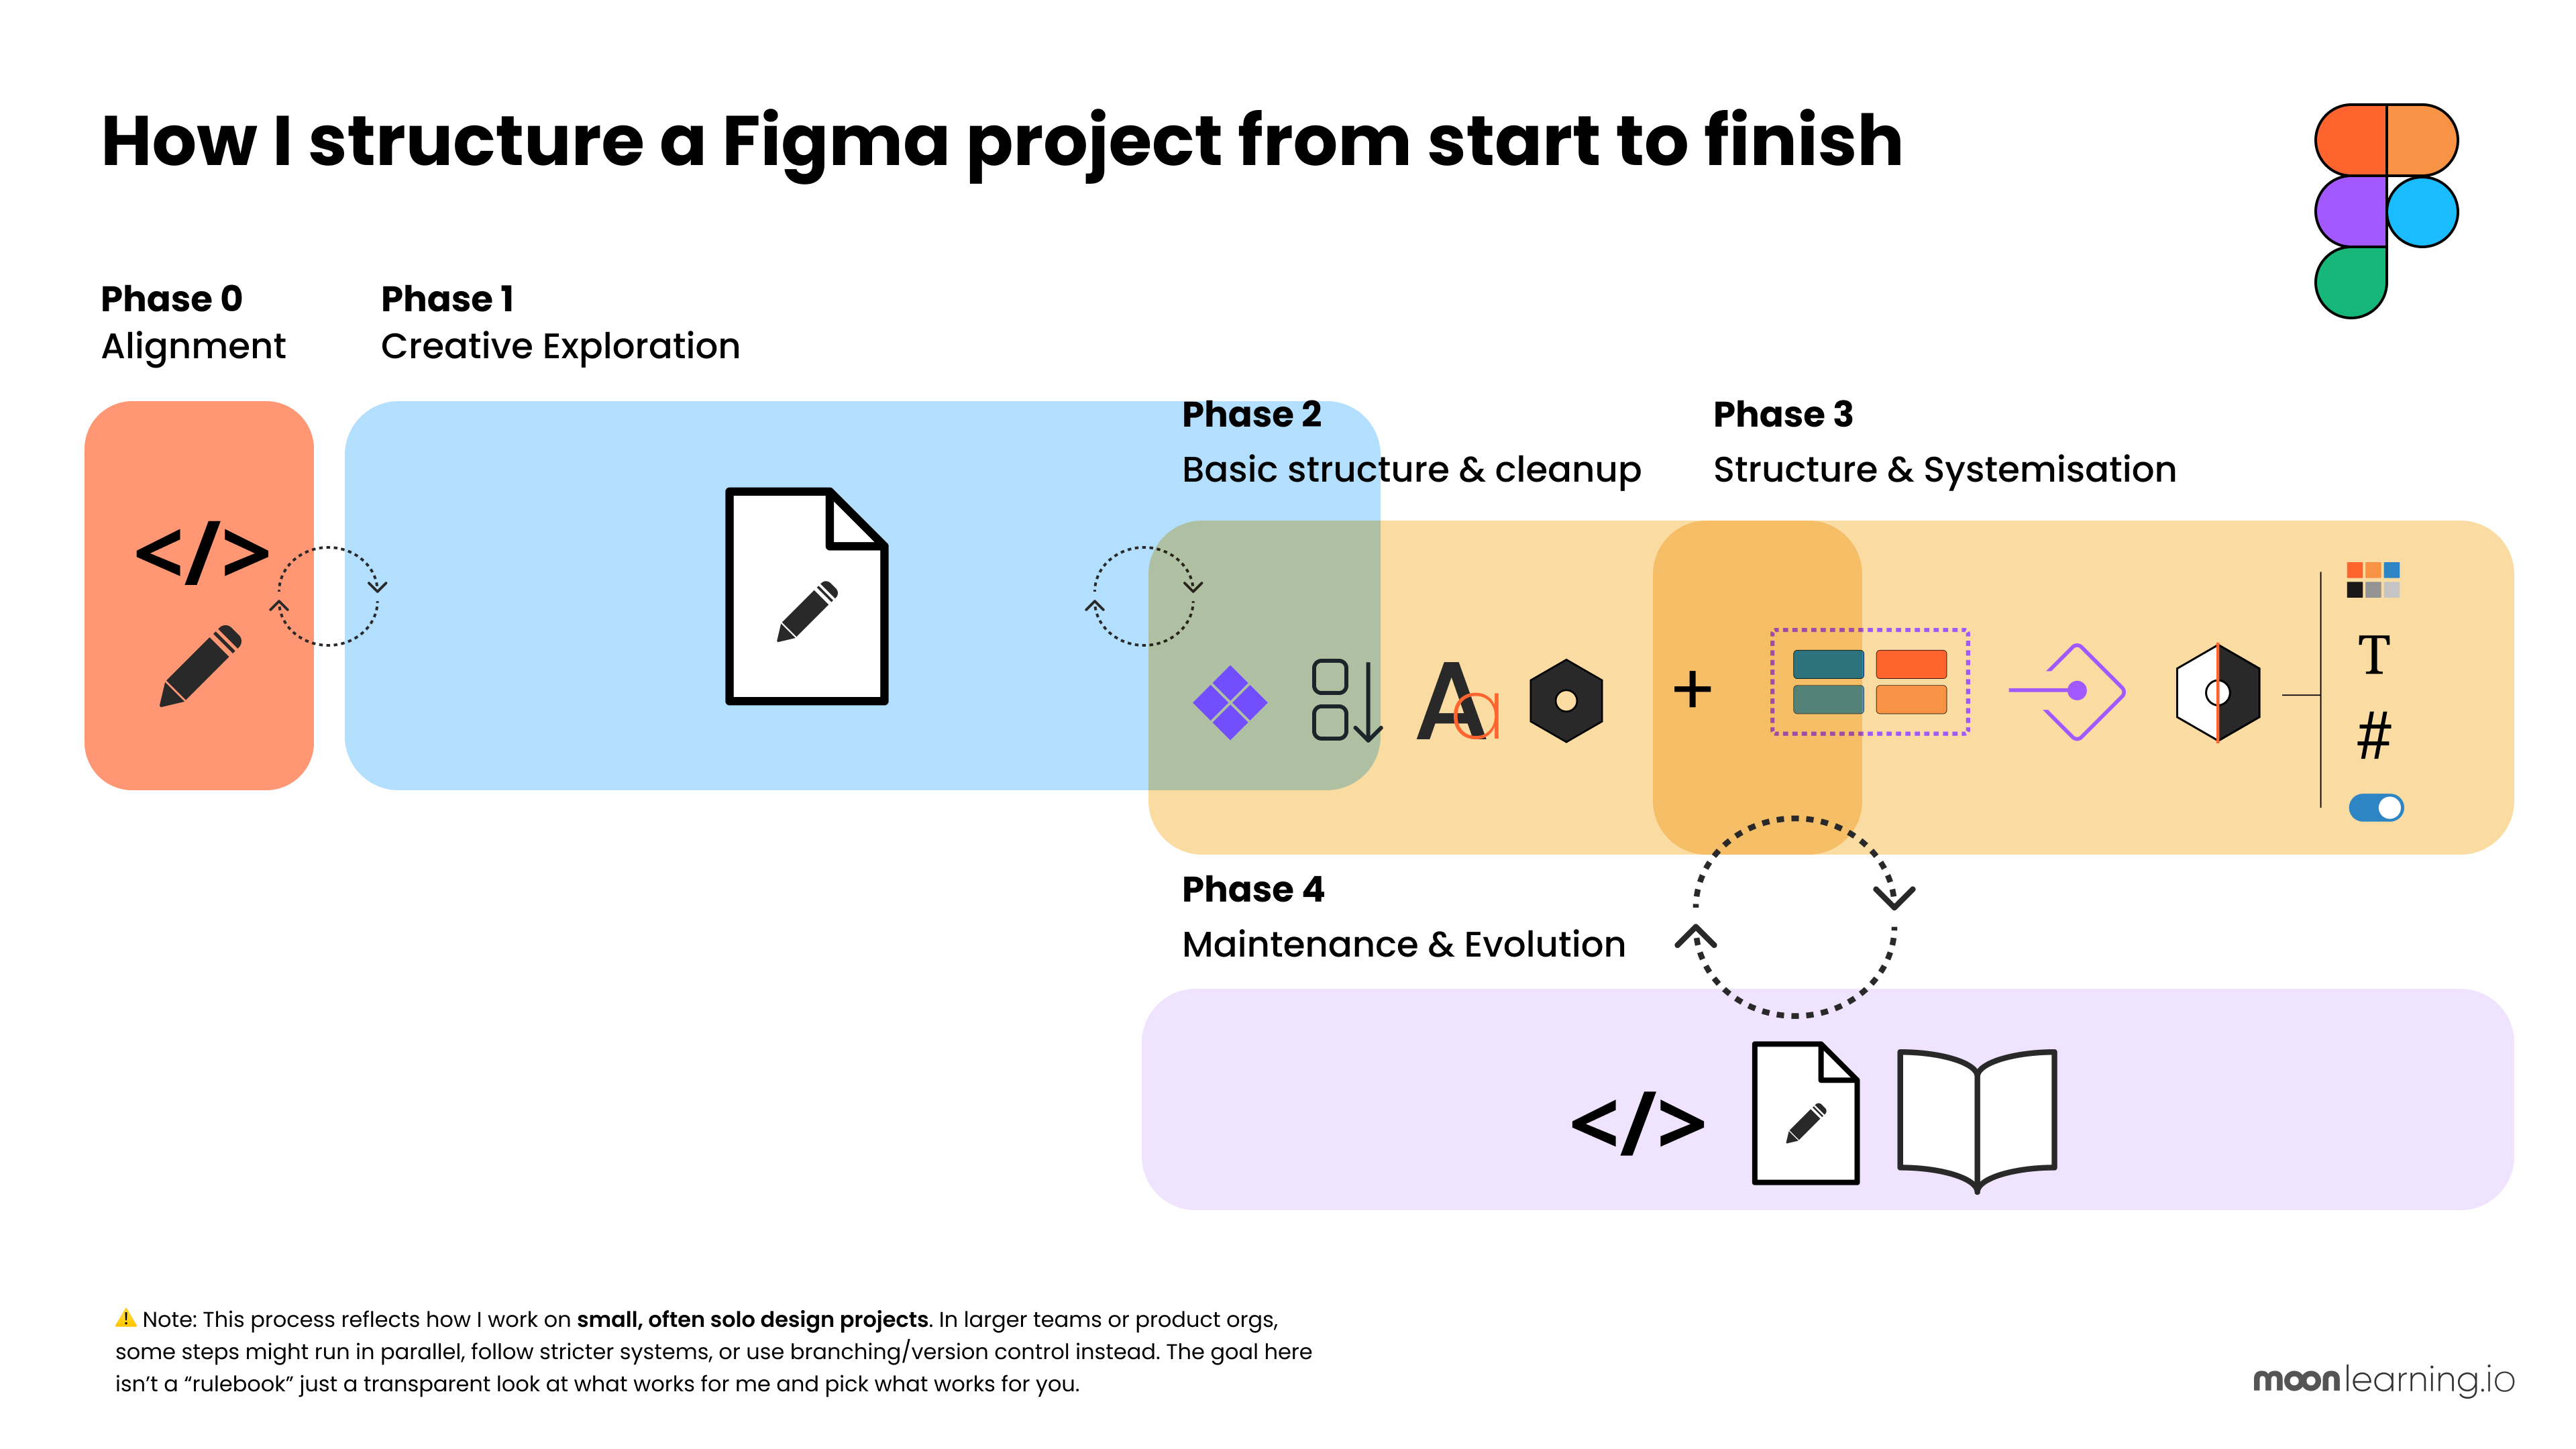
Phase 0: Setup & Alignment
Before opening Figma, I talk to development.
We align on:
- Tools and stack
- Communication setup
- Constraints, timing, and the handoff process (note, there is never just one handoff, rather a constant flow)
This saves countless hours later.
Phase 1: Creative Exploration
Nothing structured yet. It’s messy... very messy.
I even (hold your breath) use groups (I know!!!! But they are so messy fast!), no auto layout (maybe for a button), no components, randomly pick colours.
My goal is speed and flow. I move, drag, test, and iterate until it feels right; it works for me, but might not be he right path for everyone. I also enjoy combining hand sketches and Figma files. I usually work with a mix of wireframes and first ideas. But it highly depends on the project, team size and how many hats I wear.
Once it looks right, I share it with the team and development. No specs yet, just look and feel. I usually work on 2-3 master pages. Note: Testing is part of the process, but not part of this post.
Phase 2: Basic structure & cleanup
• Typography styles and clear hierarchy
• Colour variables and clear system (base, text, highlights)
• Components with Auto Layout
I also like to build a small prototype for early feedback.
Phase 3: Structure & Systemisation (loops!)
Now it gets real. The first draft might look finished, but it’s not.
• Review every component with variants, responsiveness, and states
• Refine typography styles and add variables and modes
• Align naming and documentation with dev
This takes time, a lot of time...and tight feedback loops with development.
Build out the rest of the screens with this system.
Phase 4: Maintenance & Evolution (loops!)
Once the design is structured, it becomes a living system.
New features start in a creative playground, then merge back in.
Old components get cleaned up. It’s important to agree on a clear system and responsibilities: Who adds, updates, and maintains components, and when. Doing this as a team keeps everything aligned.
The result: a consistent, scalable design (and a whole separate story)
👉 In a nutshell: I prefer full creative freedom at the start and strong systems after, especially for smaller teams or solo projects. Larger teams might merge or parallelise some of these steps.
⚠️ Quick note: This process reflects how I work on small, often solo design projects. In larger teams or product orgs, some steps might run in parallel, follow stricter systems, or use branching/version control instead.
The goal here isn’t a “rulebook” just a transparent look at what works for me and pick what works for you.
Not sure how to use all the features I just mentioned?
Not sure how to use all the features I just mentioned? No worries! Jump into my Getting Started with Figma course. You can skip the basics and go straight to an overview of the main features like components, variables, and styles. Once you feel confident, move on to the separate deep-dive sessions where I cover all the nitty-gritty details.
Just make sure you’re comfortable with the basics first!
Getting Started with Figma Course
Moonlearning news:
Upcoming Talks & Workshops
I love to combine these trips with guest lectures, exploring new projects, or simply exchanging thoughts over coffee. So, please reach out if you’d like to connect in person.
Content Convention, November 2025
Conference Talk – Mainz, Germany 🇩🇪
Figma Masterclass by Smashing Conferences, December 2025
Figma Masterclass – Online 🖥️
Smashing Conference, April 2026
Conference Talk – Amsterdam, Netherlands 🇳🇱
DaFed Conference, May 2026
Conference Talk – Novi Sad, Serbia 🇷🇸
See all workshops and events -->
Want to learn more about Figma, UI and Building?
Get a moonlearning.io membership today and access all courses, from beginner to pro, covering Figma, UI and UX principles, and how to not only design but also build your own websites and products.


Responses