This week is all about Figma variables, some insights, tips and tricks. Let’s start with the basics. Figma gives us variables and styles. But what’s the difference, and when should you use each?
Variables
• A variable is one single value (like a colour, number, or size)
• They can switch to different modes (light vs dark theme)
• They can reference each other; this is called aliasing (e.g. button background = primary colour)
👉 Use variables when it’s just one thing: a colour, a radius, a spacing unit, a size
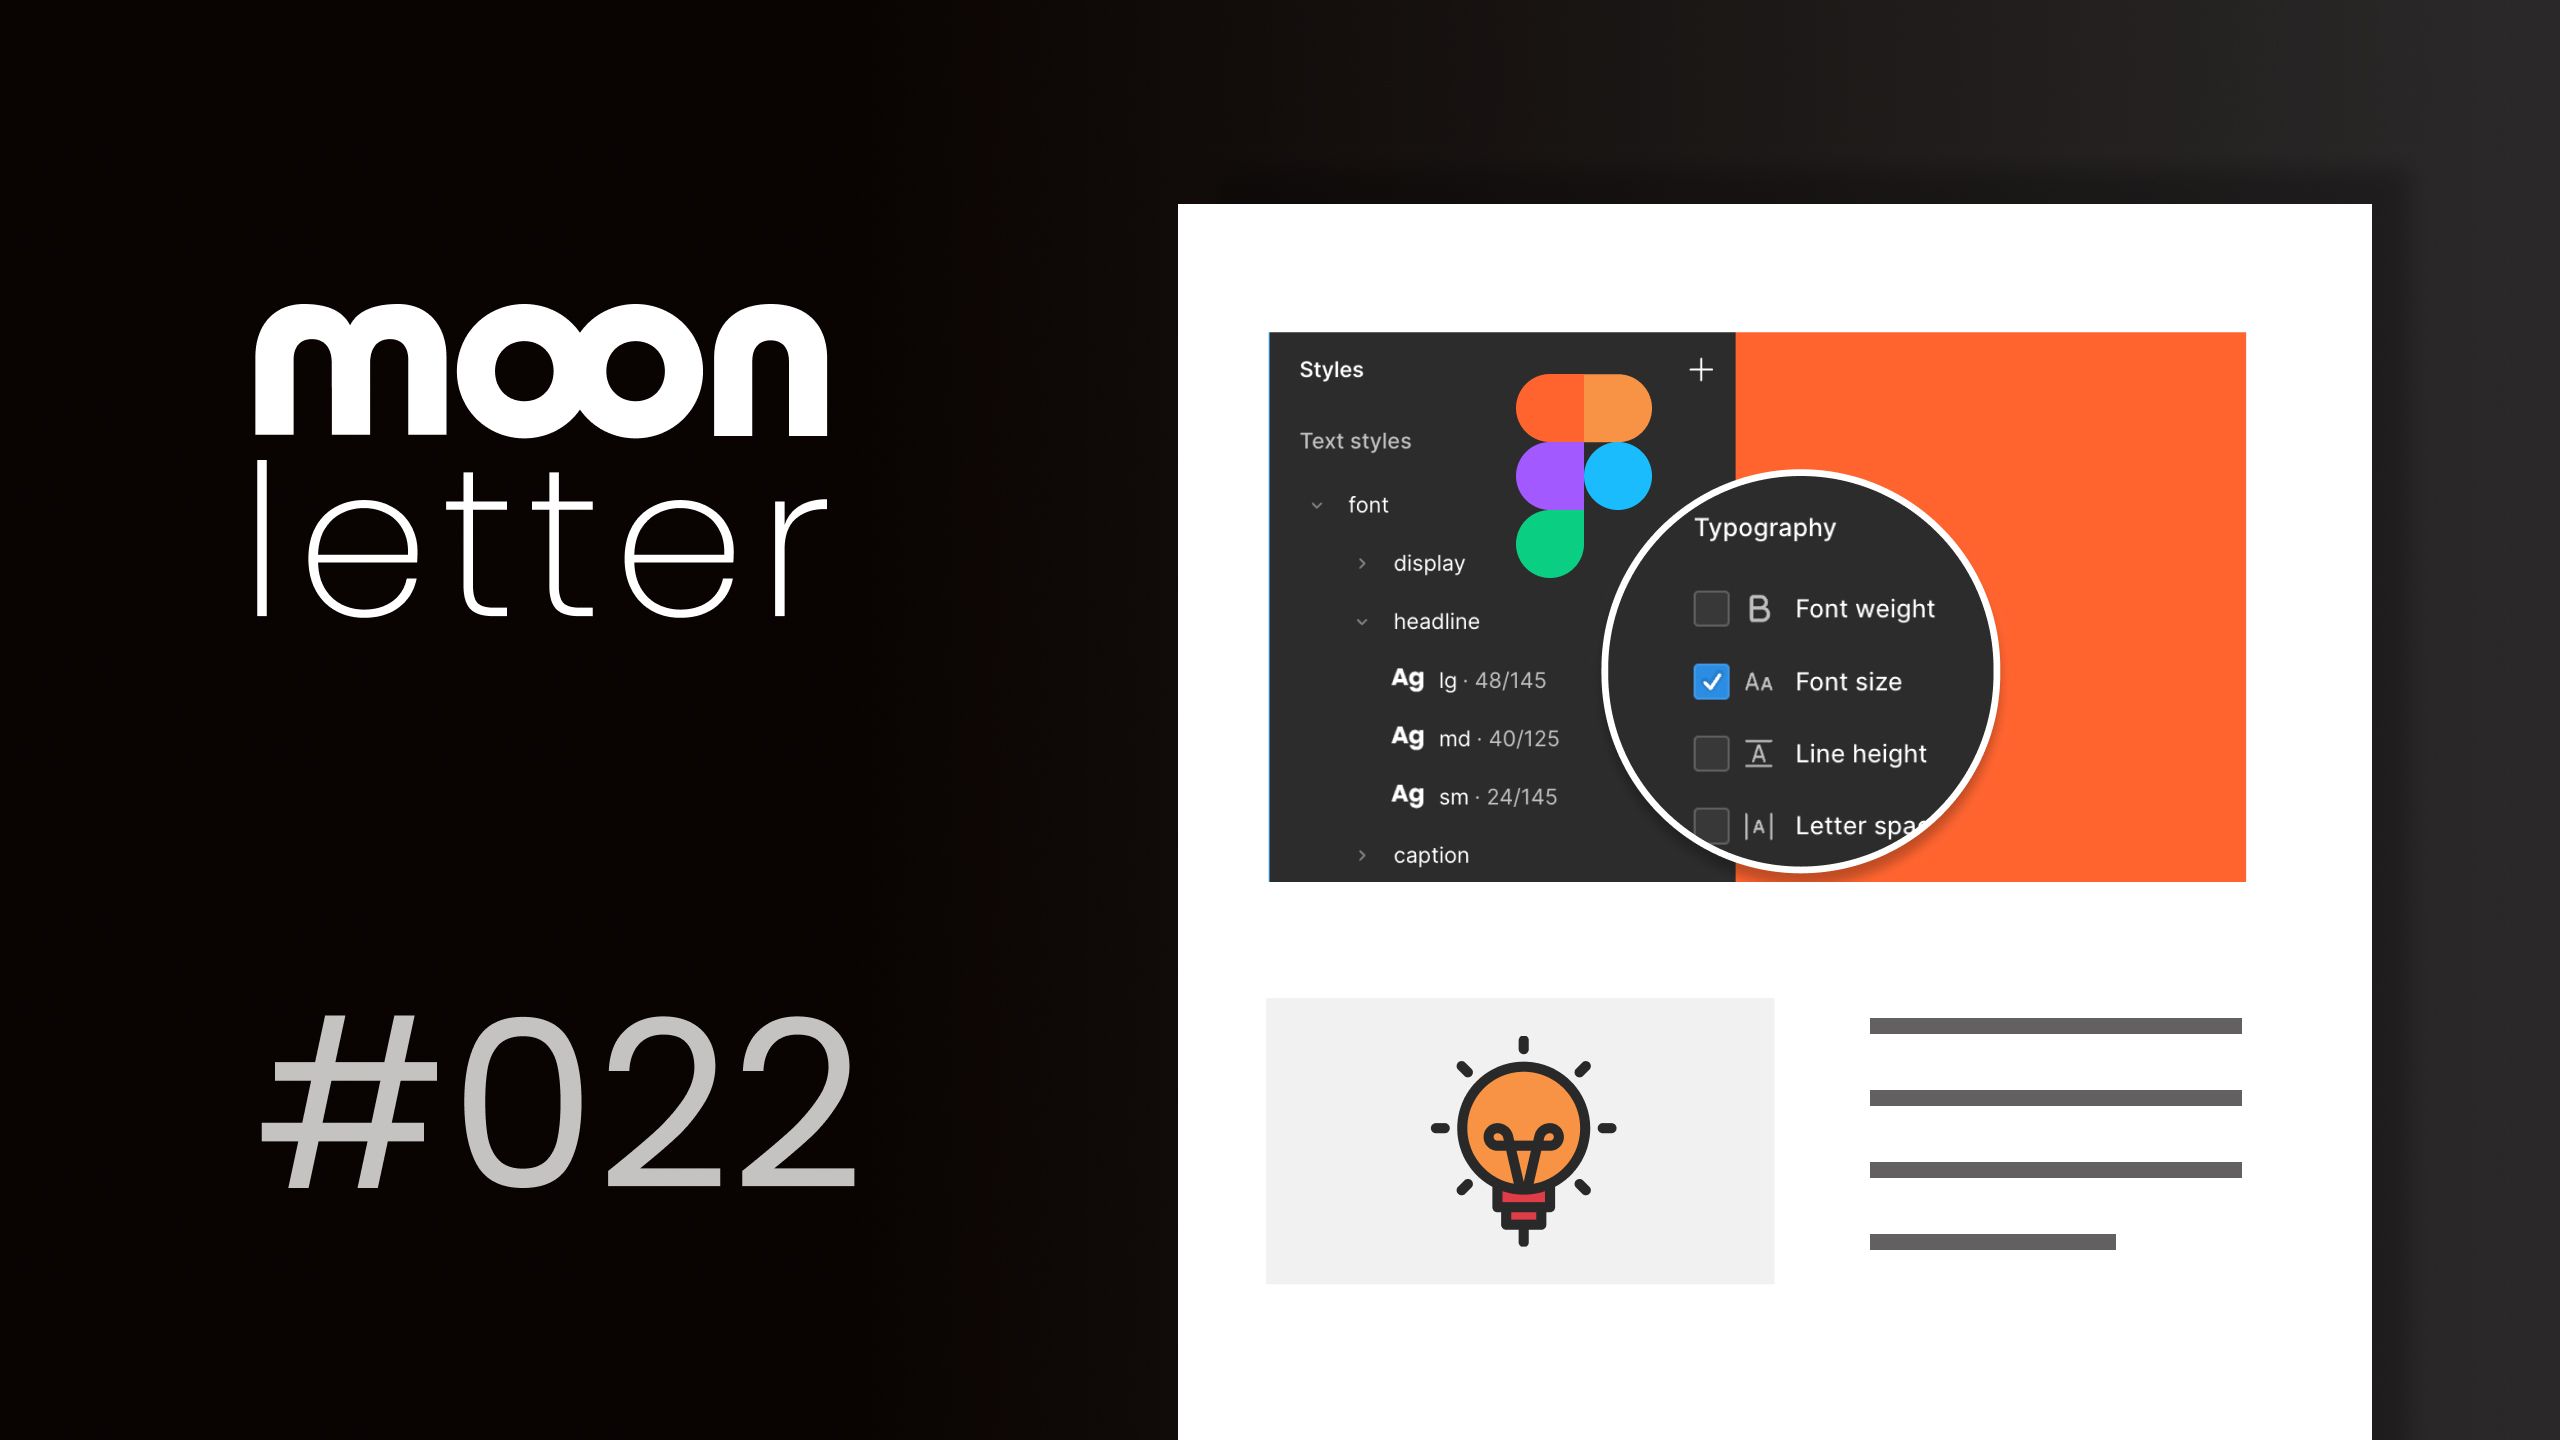
Styles
• A style is a bundle of values
• For example, a text style includes font, size, line height, and weight all together
👉 Use styles when you want to group things, like typography styles, shadows, or blurs
Where people get confused:
Initially, Figma didn’t have variables. So we defined everything with styles — even single colours. That’s why in old files (and yes, still today) you’ll often see “colour styles.”
Here’s the simple rule of thumb:
--> If it’s one value (a colour, a size, a radius), use a variable.
--> If it’s a group of values (like text, which has font, size, line height, weight), use a style.
Add Variables to Styles
Styles and variables can work together. A text style is a bundle (font, line height, weight), but you can set the size or colour, etc, inside it with variables. Change the variable once, and every style using it updates automatically.
Want to learn more? Check out my full course on variables here
Figma Variables, Tokens, and JSON. What is it?
In Figma, we use variables. But are they the same as tokens? And what is that JSON file developers keep talking about? Let’s understand this for a better workflow:
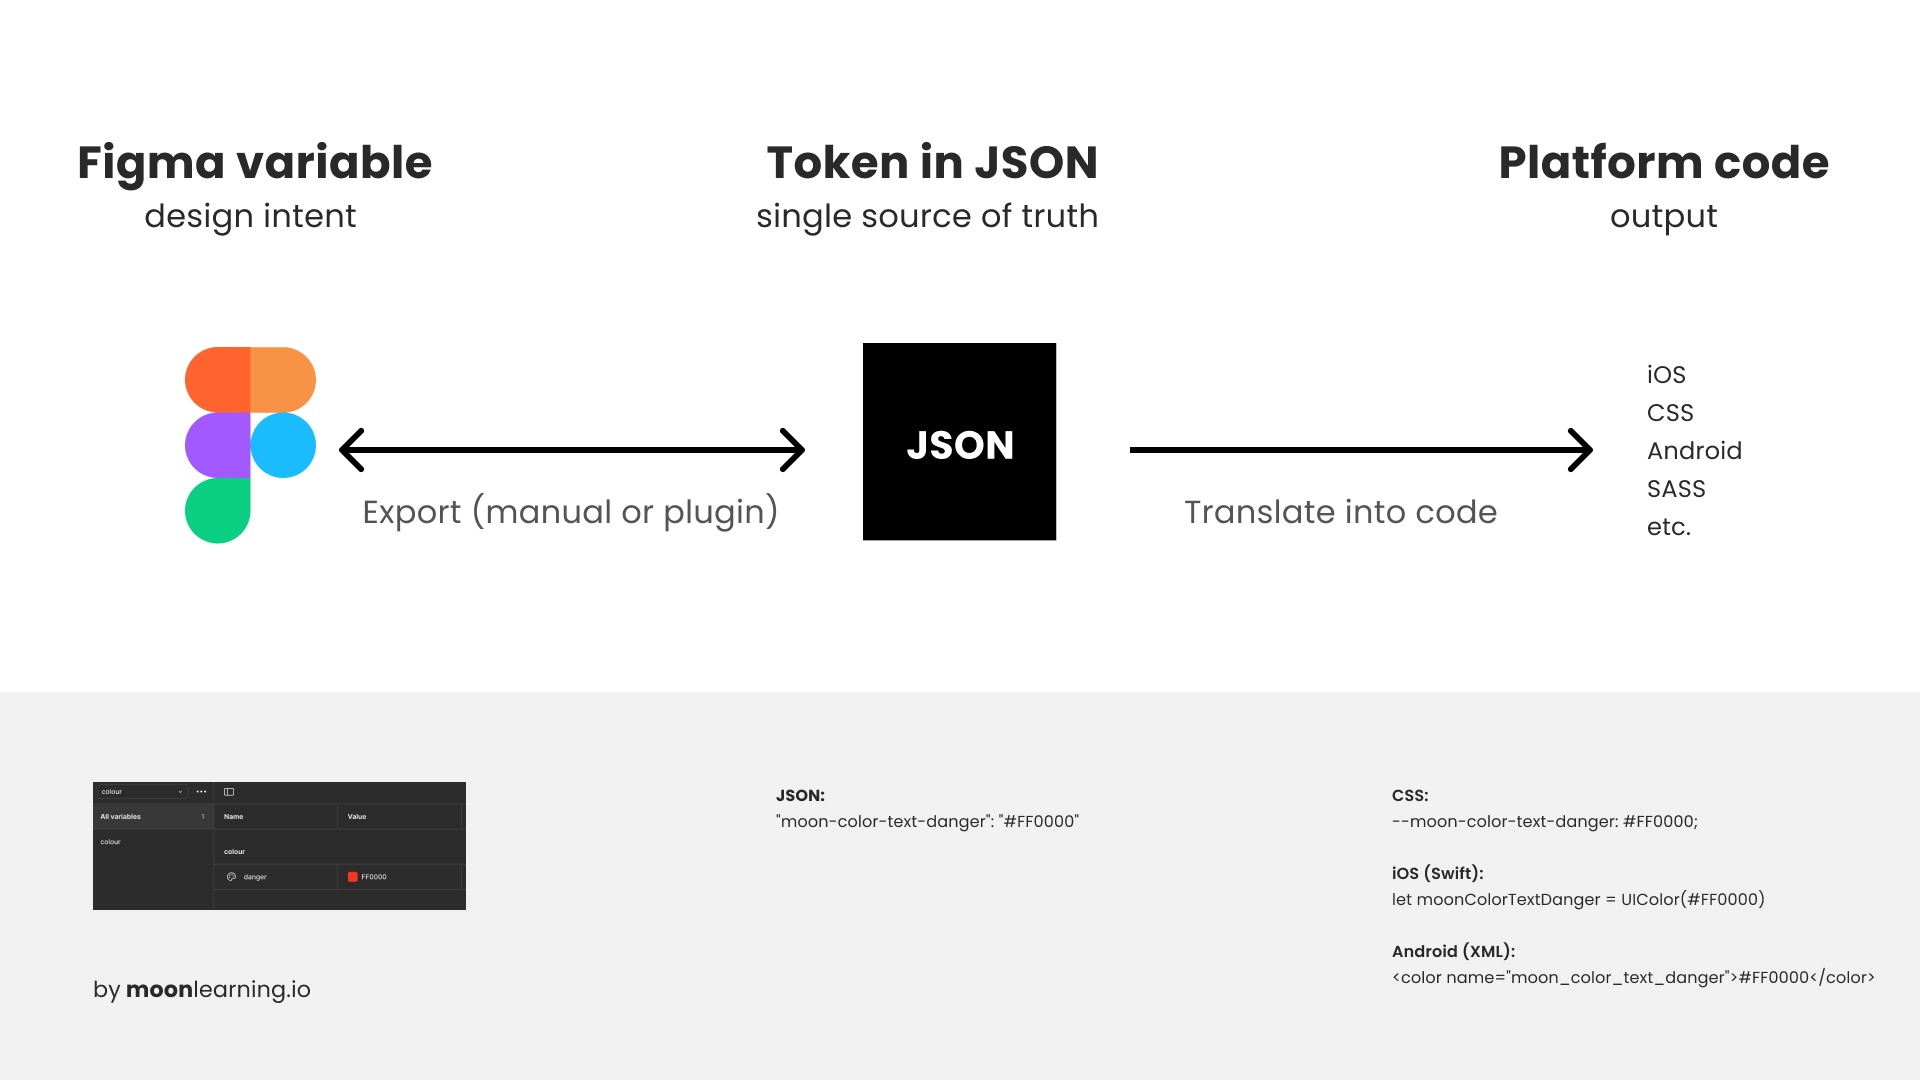
1. Variables in Figma
Variables let you define reusable values (colours, spacing, radii, etc.)so your designs stay consistent.
Example (Figma): color/danger = #FF0000
2. Design Tokens
A token is just a name + value pair, structured for code.
Example (JSON): "moon-color-text-danger": "#FF0000"
Each token represents one decision: one colour, one size, one radius. This simplicity makes tokens portable across platforms.
3. JSON as the Container
JSON files hold all tokens in a structured, consistent format. They’re:
- Machine-readable
- Tool-agnostic
- The single source of truth for both design and dev
👉 Takeaway
Figma variables keep designs consistent and can be grouped, aliased, and applied to components. With plugins like Token Studio, they’re exported into JSON tokens that developers use across platforms. The catch: Figma lacks native token export, JSON relies on plugins, naming isn’t enforced, and sync with code is still early. In short, variables power design, tokens make it code-ready, and JSON is the shared source of truth—though seamless one-click sync isn’t here yet.
Want to learn more? Check out my full course on variables here
Print Variables with one click
My favourite plugin for working with variables in Figma is "Print Variables".
The default variable panel in Figma can feel tedious to navigate. With one click, Print Variables gives you a complete overview. It is faster to scan, easier to check, and much better for spotting inconsistencies.
If you are starting to build systems with variables, this plugin is a simple but powerful helper. No paid promotion here, just a tool I find genuinely useful.
Aliasing Variables in Figma
Aliasing lets you link a variable from one collection into another, so instead of duplicating values, you create a connection.
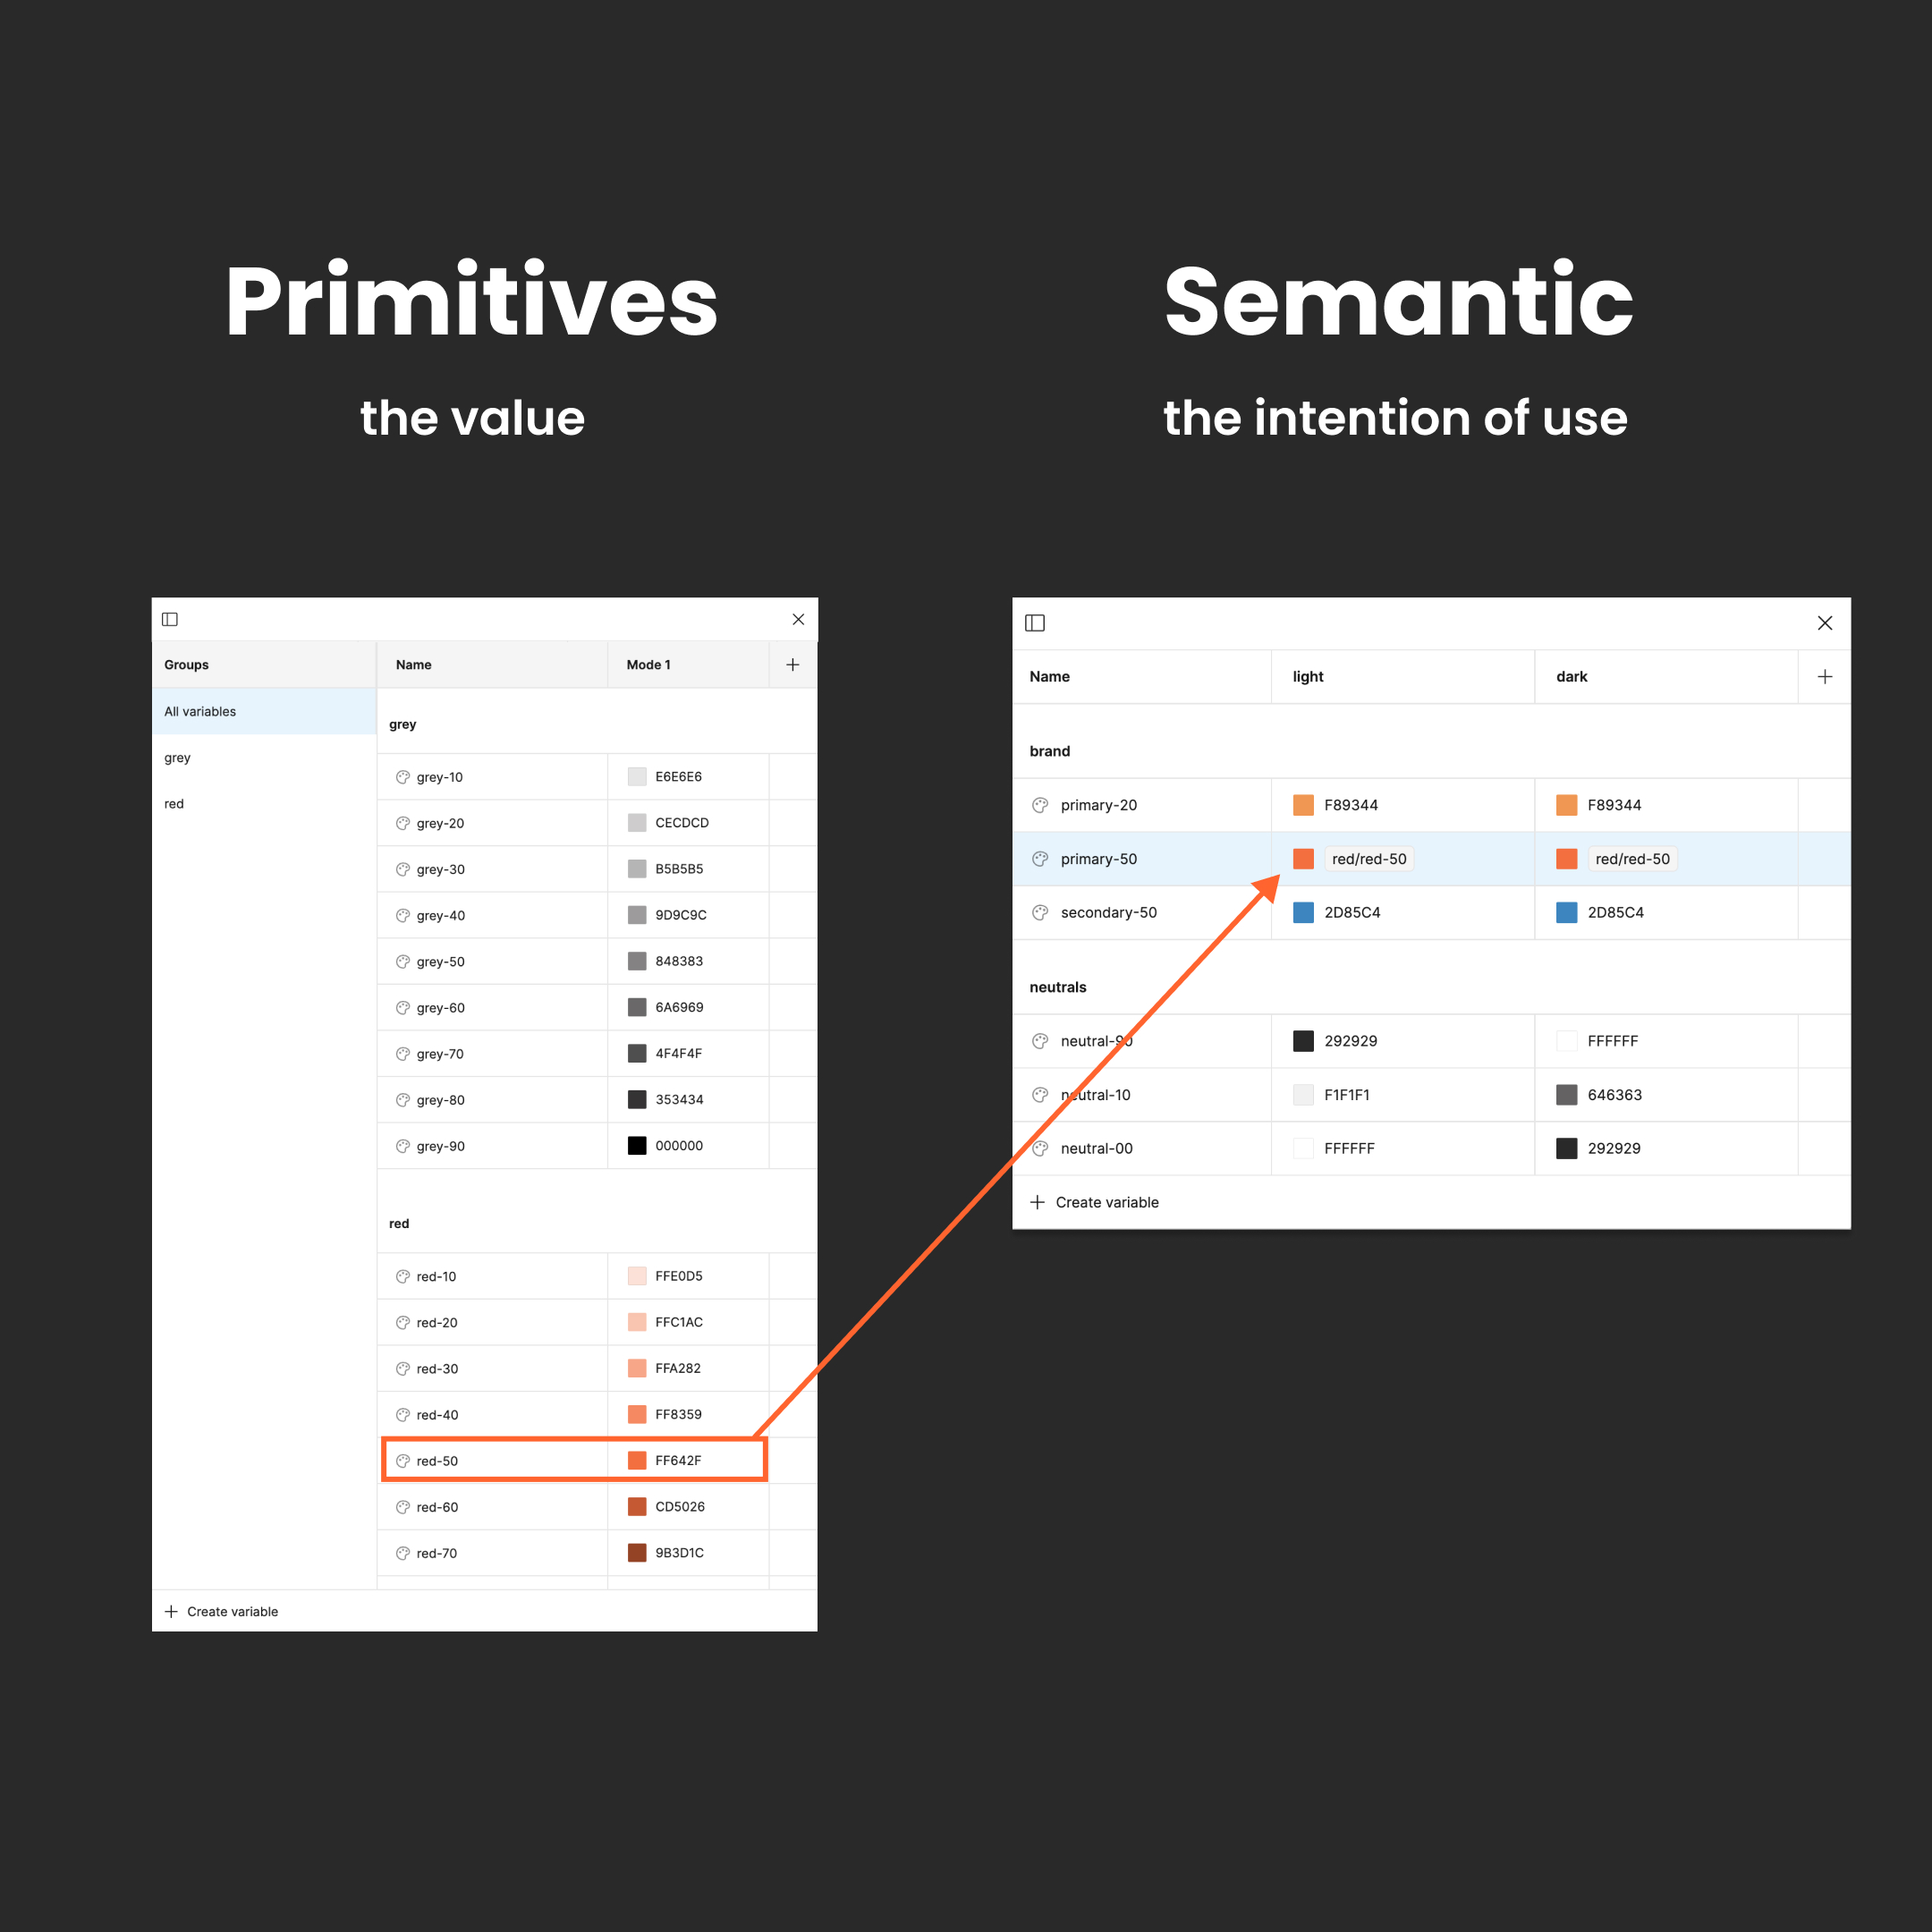
Primitives = raw scales (e.g. Grey 100, Space 16, Radius 4).
Semantics = meaningful use (e.g. Background Neutral → Grey 100, Button Radius → Radius 4).
Why both layers?
- Consistency at scale
- Easy updates (change once, update everywhere)
- Clarity (“Background Neutral” > “Grey 100”)
- A system that balances precision + intent
💡 In Figma: right-click a value → alias from another collection.
Light and Dark mode with modes
Set up light and dark mode in Figma is simple. Just add a mode to your existing colour collection and set the dark mode values. You can name the modes anything you like, such as light and dark or day and night.
You can swap modes for entire pages or components, but my preferred way is to swap the mode on the parent frame. Keep all other elements set to auto. This way, when you drag elements into that frame, they inherit the correct mode and values automatically.
P.S. And yes, that button text needs its own text variable to keep the contrast in light and dark mode. This is precisely why testing directly in Figma is so valuable.
Full variables course
Want to go deeper into variables? Check out my full course, which covers the essentials, from getting started and variable types (colour, string, number, boolean, and aliasing) to styles & typography, modes for responsive setups, and prototyping with expressions and conditional logic. You can find it here!

Moonlearning news:
Upcoming Talks & Workshops
I love to combine these trips with guest lectures, exploring new projects, or simply exchanging thoughts over coffee. So, please reach out if you’d like to connect in person.
Smashing Conference, October 2025
Conference Talk – New York, USA 🇺🇸
Fashion Institute of Technology - NYC, October 2025
Guest Lecture – New York, USA 🇺🇸
UI Principles Masterclass by IxDF, October 2025
Figma Masterclass – Online 🖥️
Content Convention, November 2025
Conference Talk – Mainz, Germany 🇩🇪
Figma Masterclass by Smashing Conferences, December 2025
Figma Masterclass – Online 🖥️
Smashing Conference, April 2026
Conference Talk – Amsterdam, Netherlands 🇳🇱
DaFed Conference, May 2026
Conference Talk – Novi Sad, Serbia 🇷🇸
See all workshops and events -->
Want to learn more about Figma, UI and Building?
Get a moonlearning.io membership today and access all courses, from beginner to pro, covering Figma, UI and UX principles, and how to not only design but also build your own websites and products.


Responses